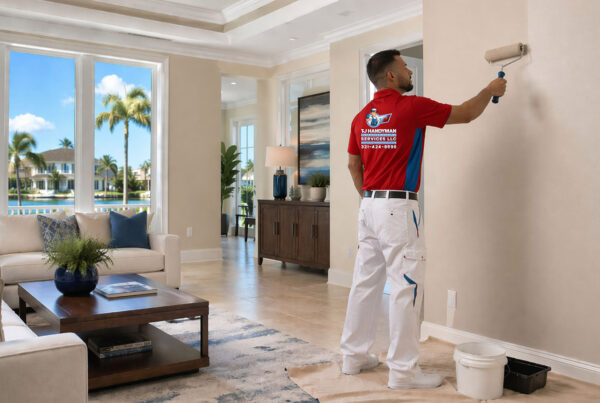

Fresh paint can brighten a room, but it cannot fix loose paint, uneven patches, or an unresolved moisture problem. Those issues need attention before the first coat goes on.
The prep and painting process includes inspecting the surfaces, protecting your home, cleaning, repairing damage, priming where needed, applying paint, and checking the finished work. For Orlando homeowners, exterior projects also need a plan for rain and suitable application conditions.
Understanding these steps helps you compare estimates and know what to expect. Whether you’re refreshing a bedroom or planning a larger repaint, here’s how to approach the project with TJ Handyman Services.
In this guide
- What to confirm before painting
- Surface preparation and repairs
- Primer and paint application
- Orlando weather considerations
- Cost and timeline factors
- Homeowner preparation checklist
- Frequently asked questions
Start With a Clear Painting Scope
Before choosing a start date, decide exactly what needs painting. “Paint the bedroom” can mean walls only, or it can include the ceiling, doors, baseboards, and closet.
A useful project discussion should cover:
- Surfaces: Which rooms, walls, trim, or exterior areas are included?
- Condition: Are there holes, peeling areas, stains, or damaged drywall?
- Finish: What color and sheen do you want?
- Access: Who will move furniture and remove wall decorations?
- Scheduling: Which areas need to remain usable?
- Repairs: What happens if preparation reveals additional damage?
Test color samples in the actual space before making your final choice. Look at them in daylight and under the lighting you use at night.
For a rental property, also coordinate access with tenants and leave room in the turnover schedule for repairs and drying. For exterior color changes, check any applicable HOA approval process before ordering paint.
The Prep and Painting Process, Step by Step
1. Inspect the Surface Before Covering It
The first question is whether the surface is ready to receive a new finish.
Point out recurring cracks, peeling areas, soft drywall, and stains during the initial assessment. Explain whether a stain is old or has returned after previous repairs.
This helps separate cosmetic work from problems that need further investigation. If damage keeps returning, ask what needs to be resolved before painting becomes part of the solution.
For older homes, discuss lead before disturbing existing coatings. EPA warns that renovation work involving lead-based paint in pre-1978 homes can create hazardous dust and recommends hiring a lead-safe certified contractor. See EPA’s lead-safe renovation guidance.
2. Protect Floors, Furniture, and Nearby Areas
Agree on protection and access before work begins.
Inside, this means planning for floors, furniture, nearby belongings, and routes through the home. Outside, discuss nearby vehicles, patio furniture, landscaping, and adjacent surfaces.
Ask who handles heavy furniture, fragile items, and anything attached to the walls. Avoid assuming that every item will be moved as part of a standard painting estimate.
If your household includes children or pets, choose a separate area for them while work is underway. Let the painter know about any access restrictions or rooms that must remain available.
3. Clean and Allow Surfaces to Dry
Paint preparation includes removing contamination that could interfere with the new coating. Kitchen walls may need attention to grease, while other areas may have dust or cleaning residue.
Benjamin Moore advises cleaning walls and allowing them to dry thoroughly before painting. Its guidance also calls for addressing mildew and removing loose paint instead of coating over those problems. Read its wall preparation recommendations.
If you see recurring growth or moisture damage, raise it during the assessment so the underlying issue can be addressed.
4. Repair Damage and Prepare the Texture
Discuss repairs as a distinct part of the estimate. Ask whether the scope includes small nail holes, larger patches, damaged corners, or texture matching.
This is especially useful when you want to remove shelves, relocate artwork, or change wall-mounted fixtures. Making those decisions early allows the repair plan to account for the final arrangement.
For textured walls, ask how repaired areas will blend with the surrounding finish. If damaged areas need more attention, TJ Handyman Services offers drywall repair in Orlando to discuss alongside the painting work.
Before application, the surface should meet the selected product’s preparation requirements. Those can include smoothing rough areas, preparing glossy finishes, and removing sanding dust.
5. Prime Where the Surface Requires It
Primer is a separate decision based on the existing surface and the coating system.
Benjamin Moore notes that many sound, previously painted interior walls do not require primer. Bare areas, stains, and other special conditions can require a suitable primer before the finish coats. Its painting FAQs explain why priming needs vary.
Ask your painter:
- Which areas need primer?
- Will priming cover individual repairs or the full surface?
- Is a specialty primer needed for stains or adhesion?
- Is that work included in the estimate?
A clear answer is more useful than assuming every project needs the same preparation.
6. Apply the Selected Paint System
Confirm the product, color, sheen, and planned coverage before application starts.
Walls, trim, doors, and exterior surfaces may need different products. Ask why the proposed coating suits each surface and how it fits your priorities, such as washability or appearance.
Application and coat requirements should follow the selected product’s instructions. For example, Benjamin Moore’s Regal Select matte technical data sheet specifies its own preparation and application requirements. Those instructions should not be treated as universal rules for every paint.
Your written scope should also explain how additional coverage will be handled if the original color remains visible.
7. Review the Work and Complete Cleanup
Make time for a final walkthrough before the project is closed out.
Review the agreed surfaces together and point out anything that needs attention. Check edges, coverage, repaired areas, and spaces around doors and trim.
Confirm that cleanup and moving items back follow the original agreement. Ask for the paint brand, product name, color formula, and sheen so you have a useful record for future maintenance.
Finally, request product-specific guidance on when to clean the finish or return items that could press against it.
How Orlando Conditions Affect Exterior Painting
For Orlando exterior projects, ask how the schedule accounts for showers, damp surfaces, and changes in weather.
Sherwin-Williams advises against painting immediately after rain or when rain is predicted, and emphasizes a clean, sound, dry surface. Its exterior surface preparation guide also recommends checking compatibility before a full application.
A useful scheduling conversation should answer:
- How will surface readiness be checked?
- What conditions would postpone application?
- How much protection from rain does the selected product require?
- How will a weather delay affect the remaining work?
For interior projects, explain how you use the space and discuss ventilation requirements for the chosen products. Plan room access around the actual work and drying schedule.
What Affects Painting Cost?
A useful estimate explains the preparation and finishing work behind the price.
Two rooms with similar floor plans may need different amounts of repair, protection, or detail work. Compare the written scope alongside the total.
| Project factor | What to clarify in the estimate |
|---|---|
| Surfaces included | Walls, ceilings, trim, doors, closets, and exterior details |
| Existing damage | Which repairs are included and what requires separate approval |
| Preparation | Cleaning, surface preparation, protection, and priming |
| Paint selection | Product line, finish, colors, and coverage plan |
| Access | High ceilings, stairwells, furniture, and occupied rooms |
| Completion | Cleanup, touch-ups, walkthrough, and care instructions |
To make estimates easier to compare, give each provider the same list of surfaces and concerns. Photos are helpful, but an on-site assessment may reveal conditions that are difficult to judge remotely.
If you’re unsure whether your walls need repair before repainting, contact TJ Handyman Services to discuss your Orlando painting project.
How Long Does the Process Take?
The schedule depends on the project’s size, repairs, preparation, coating requirements, and access.
Ask for a timeline that separates active work from waiting periods. A repair may need additional preparation before painting, and paint has product-specific drying requirements.
Benjamin Moore directs homeowners to each product’s technical data sheet for drying information because times vary. Avoid planning furniture delivery or tenant move-in around a generic promise that all paint is ready the same day.
For larger projects, ask whether work can be organized by room or area. That makes it easier to plan around bedrooms, kitchens, and frequently used entrances.
Your Before-Painting Checklist
A few decisions made in advance can help the project run more smoothly:
- Confirm colors, sheens, and all included surfaces.
- Remove artwork, fragile belongings, and small valuables.
- Agree on responsibility for heavy furniture.
- Identify hooks or fixtures you want removed permanently.
- Point out past leaks, recurring stains, and previous repairs.
- Arrange access, parking, and a separate space for pets.
- Discuss ventilation and when each area can be used again.
- Save a copy of the written scope and approved changes.
Common Painting Mistakes to Avoid
Comparing price without comparing scope. A lower total may include fewer surfaces or less preparation. Ask what each estimate covers.
Changing the plan after repairs begin. Deciding late to remove shelving or paint additional trim can affect both cost and scheduling.
Treating primer as a substitute for repairs. Ask separately about repairing the surface and preparing it for the finish.
Planning around one fixed drying time. Follow the selected product’s guidance and account for actual conditions.
Skipping the walkthrough. Review the work while the project details are still fresh and agree on any remaining items.
Frequently Asked Questions
Do all walls need sanding before painting?
No. Preparation depends on the surface condition and coating requirements. Rough areas, repair edges, and glossy finishes may need attention, while an older coating should be assessed for lead concerns before it is disturbed.
Do I need primer if I’m using paint and primer in one?
Possibly. Ask whether the product is suitable for your existing surface and whether bare areas, stains, or adhesion issues require a separate primer. The product label and surface assessment should guide the decision.
Can damaged drywall be repaired before painting?
Yes, drywall repair can be included in the project plan. Ask which repairs are covered, whether texture matching is needed, and whether any underlying damage needs attention first.
How many coats of paint will my home need?
That depends on the product, surface, existing color, and intended finish. Have the estimate explain the planned coats and how any additional coverage will be handled.
Should I paint the room myself or hire a professional?
A small, accessible room with sound surfaces may be a manageable DIY project. Consider professional help when the work involves extensive repairs, difficult access, uncertain coatings, or a schedule that leaves little room for mistakes.
How do I care for the new finish?
Keep the product information and follow its instructions for curing and cleaning. Ask when you can wash the surface and what cleaning methods are appropriate before using household cleaners on it.
Plan Your Painting Project With TJ Handyman Services
A clear preparation plan helps you understand the work before painting begins. Start by identifying the surfaces, discussing repairs, and agreeing on the finish and schedule.
TJ Handyman Services serves Orlando and surrounding Central Florida communities. To discuss your prep and painting process, call 321-424-8590 or contact TJ Handyman Services.
Share which areas you want painted, the condition of the surfaces, and your preferred timing so the conversation starts with the details that matter.