
Light mounting services can transform your home’s look and feel in just one day. Whether you need new ceiling lights, fancy chandeliers, or modern LED fixtures, proper installation makes all the difference. At TJ Handyman Services, we help Orlando homeowners brighten their spaces safely and professionally.
Key Takeaways
- Professional light mounting saves time and prevents costly mistakes
- Different light types need different installation methods and tools
- Safety should always come first when working with electrical fixtures
- Proper mounting ensures your lights last longer and work better
- Orlando homeowners trust local experts for quality light installation
Ceiling Light Installation: Getting Started Right
Ceiling light installation is one of the most common requests we get from Orlando homeowners. Most people think it’s simple, but there’s more to it than just screwing in a fixture. The key is planning and using the right tools.
First, turn off the power at the breaker box. This keeps you safe while working. Next, verify that your ceiling box can support the weight of your new light. Heavy fixtures need special mounting hardware.
Many ceiling lights come with specific instructions. Always read these first. Some need special brackets or mounting plates. Others attach directly to the ceiling box. The type of ceiling you have also matters; drywall, plaster, and concrete all require different approaches.
Planning Your Ceiling Light Project
Before you start any ceiling light work, measure your space. A light that’s too big or too small won’t look right. For dining rooms, the light should be about 12 inches narrower than your table. In bedrooms, keep lights at least 7 feet from the floor.
Think about the style too. Modern homes often use clean, simple fixtures. Traditional homes might need more detailed designs. Your ceiling height also affects which lights work best.
Light Fixture Mounting: Tools and Techniques
Light fixture mounting requires the right tools and careful work. Most jobs need a drill, screwdrivers, wire nuts, and a voltage tester. Having everything ready before you start makes the job go much smoothly.
The mounting process depends on your fixture type. Some lights hang from chains or cables. Others mount flush to the ceiling. Heavy fixtures may require additional support beams in your attic.
Wire connections are critical for safety. Always match wire colors – black to black, white to white, and green to ground. Use wire nuts to secure all connections. Loose wires can cause fires or electrical problems.
Common Mounting Mistakes to Avoid
Many DIY projects go wrong because people skip important steps. Don’t rush the planning phase. Ensure you have the correct electrical box for your fixture’s weight. A standard box holds about 50 pounds, but heavier lights need special bracing.
Another common mistake is failing to check wire compatibility. Old homes might have outdated wiring that needs upgrading. If you’re unsure about your electrical system, consult a professional.
Chandelier Hanging Service: Handling Heavy Fixtures
Chandelier hanging service requires extra care because these fixtures are heavy and expensive. Most chandeliers weigh 20 to 200 pounds or more. Your ceiling requires proper support to hold this weight safely.
Before hanging any chandelier, we check the ceiling structure. Some homes need additional bracing between ceiling joists. This extra support prevents the fixture from falling and causing damage to your home.
Height is also crucial for chandeliers. In dining rooms, hang them 30 to 36 inches above your table. In entryways, keep at least 7 feet of clearance from the floor. High ceilings might need longer chains or downrods.
Chandelier Installation Safety Tips
Working with heavy chandeliers can be dangerous. Always have someone assist you in lifting and positioning the fixture. Use a sturdy ladder that’s rated for your weight plus the weight of the chandelier.
Test your ceiling box before installing. If it feels loose or moves when you pull on it, don’t hang your chandelier there. You might need to install a new box with proper bracing.
Install Pendant Lighting: Modern Style Solutions
Pendant lighting projects are popular in modern Orlando homes. These hanging lights work great over kitchen islands, dining tables, and bathroom vanities. They come in many styles, from simple glass globes to complex artistic designs.
Pendant lights usually hang from cords or chains. The length matters an excellent deal for both appearance and function. Hang them over kitchen counters 28 to 34 inches above the surface. For dining tables, a height of 30 to 36 inches works best.
Most pendant installations need multiple lights spaced evenly. For kitchen islands, use two lights for islands up to 6 feet long. Longer islands might need three or more lights for even coverage.
Choosing the Right Pendant Lights
Size matters when picking pendant lights. Small pendants get lost in large spaces. Oversized pendants can overwhelm small areas. A good rule of thumb is to choose pendants that are approximately one-third the width of your island or table.
Consider the light output, too. Task areas, such as kitchen prep spaces, need bright, focused light. Dining areas can utilize softer, warmer lighting for a cozy ambiance.
Recessed Lighting Installer: Clean, Modern Look
Recessed lighting installer services create clean, modern lighting without hanging fixtures. These lights sit flush with your ceiling and provide even light throughout the room. They’re perfect for low ceilings or minimalist designs.
Installing recessed lights means cutting holes in your ceiling. This requires careful measuring and the right tools. The holes need to be perfectly sized for your light cans. Too big, and the lights look sloppy. Too small and they won’t fit.
Most recessed lights need about 4 to 6 feet of space between them. This gives good light coverage without dark spots. The exact spacing depends on your ceiling height and the type of bulbs you use.
Recessed Light Planning Guide
Planning is crucial for achieving success with recessed lighting. Map out your room and mark where you want each light. Check for ceiling joists, pipes, or ducts that might be in the way. Moving these obstacles incurs additional time and expense.
Think about light zones, too. You may want to consider dimmer switches for different areas. Living rooms often need both bright task lighting and soft ambient lighting.
LED Light Fixture Install: Energy-Efficient Upgrades
LED light fixture install projects save money on energy bills while providing better light. LED lights use up to 80% less energy than old incandescent bulbs. They also last much longer, often 15 to 25 years, with regular use.
Many LED fixtures come as complete units. You replace the entire fixture, not just the bulb. This gives you better light quality and more style options. Some LED fixtures can change color temperature from warm to cool white.
Bright LED fixtures connect to your phone or voice assistants. You can dim them, change colors, or set schedules. These features add convenience and can help save even more energy.
LED Installation Benefits
LED fixtures produce less heat than traditional lights. This makes them safer and more comfortable in small spaces. They also start up instantly, without the warm-up time that some other lights require.
The upfront cost of LED fixtures is higher, but the energy savings add up quickly. Most homeowners see lower electric bills within the first month after installation.
Wall Sconce Installation: Accent and Task Lighting
Wall sconce installation adds both style and function to your home. These fixtures mount directly to your wall and work great for hallways, bathrooms, and living rooms. They can provide task lighting for reading or accent lighting for artwork.
Height is critical for wall sconces. In bathrooms, mount them at eye level on both sides of mirrors. This eliminates shadows on your face. In hallways, place them about 6 feet from the floor for good coverage.
Most wall sconces need electrical boxes in your walls. If you don’t have power where you want the lights, you’ll need to run new wiring. This is more complex and may require the services of a licensed electrician.
Sconce Placement Tips
Consider furniture placement when installing wall sconces. You don’t want them blocked by tall bookcases or artwork. In bedrooms, place reading sconces about 4 feet from the floor next to beds.
Think about switching locations, too. Having separate switches for different sconces gives you more lighting control throughout your home.
Lighting Contractor Near Me: Finding Local Experts
Lighting contractor near me searches help Orlando homeowners find qualified professionals. Local contractors are familiar with Florida building codes and standard home construction methods. They also know which products work best in our climate.
When choosing a lighting contractor, check their license and insurance. Florida requires contractors to be licensed for electrical work. Insurance protects you in the event that something goes wrong during the installation process.
Ask for references from recent customers. Good contractors are happy to share examples of their work. Look for contractors who specialize in residential lighting rather than commercial projects.
Questions to Ask Contractors
Before hiring any contractor, ask about their experience with projects similar to yours. Some specialize in chandeliers, others focus on recessed lighting. Please make sure they’re comfortable with your specific needs.
Get written estimates from at least three contractors. Compare not just prices but also what’s included. Some contractors provide all materials, others expect you to buy fixtures separately.
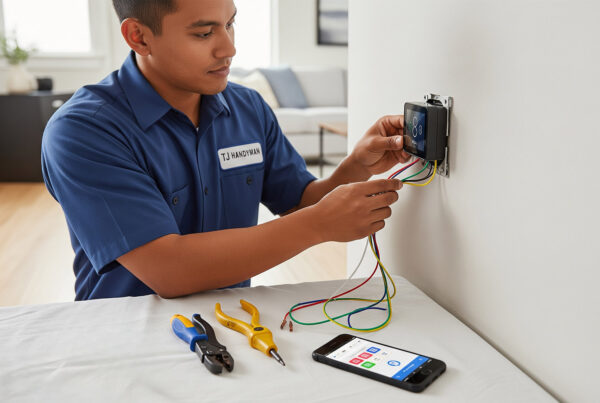
Electrical Light Mounting: Safety First Approach
Electrical light mounting involves working with live wires and electrical connections. Safety should always be your top priority. Even simple projects can be dangerous if you don’t follow proper procedures.
Always turn off the power at the breaker before starting any electrical work. Use a voltage tester to ensure the power is off. These tools cost less than $20 and can save your life.
Understand your home’s electrical system before starting major projects. Older homes might have outdated wiring that needs upgrading. Some insurance companies require electrical work to be done by licensed professionals.
Electrical Safety Checklist
Before any electrical project, check these safety items:
- Power is off at the breaker
- The voltage tester confirms no power in the wires
- You have the proper tools and ladder
- Someone else is home in case of an emergency
- You understand local electrical codes
Flush Mount Light Install: Space-Saving Solutions
Flush mount light install projects work great for low ceilings and small spaces. These fixtures sit directly against your ceiling with no hanging parts. They provide good light coverage without taking up visual space.
Most flush-mount lights are easier to install than hanging fixtures. They’re lighter and don’t need special ceiling bracing. However, you still need to use proper electrical boxes and follow safe wiring practices.
Select flush-mount lights based on your room’s size. Small fixtures are ideal for use in closets and hallways. Larger rooms need bigger fixtures or multiple lights for adequate coverage.
Flush Mount Style Options
Flush-mount lights are available in a variety of styles, ranging from traditional to ultra-modern. Glass fixtures distribute light evenly throughout the room. Metal fixtures can match your other hardware and decor.
Some flush-mount lights include fans for Florida’s warm weather. These combination units save space while providing both lighting and air circulation.
Light Replacement Services: Keeping Your Home Bright
Light replacement services keep your home properly lit when fixtures break or wear out. Even high-quality lights eventually need replacement due to age, damage, or changes in style. Professional replacement ensures your new lights work safely and look great.
Sometimes replacement is more complex than it seems. Your new fixture might be heavier than the old one. Or you might want to upgrade from basic fixtures to smart lights. These changes can require new wiring or stronger mounting systems.
Consider upgrading to LED fixtures when replacing old lights. The energy savings and longer life make LEDs a wise investment. Many utility companies offer rebates for LED upgrades, too.
When to Replace vs. Repair
Not every light problem needs a complete replacement. Flickering lights may require new bulbs or reconnected wire connections. However, if fixtures are damaged, outdated, or insufficiently lit, replacement is usually the better choice.
Old fixtures with worn-out sockets or damaged wiring should be replaced for safety reasons. Attempting to repair severely damaged electrical fixtures can be hazardous.
Handyman Light Installation: Professional Results
Handyman light installation combines electrical knowledge with general repair skills. At TJ Handyman Services, we handle everything from simple bulb changes to complex chandelier installations. Our experience helps us solve problems that DIY projects often run into.
Professional installation saves time and prevents costly mistakes. We bring the right tools and know-how to handle unexpected issues. Things like missing ceiling boxes, incompatible wiring, or structural problems don’t slow us down.
We also clean up after installation and thoroughly test everything to ensure it works properly. Your lights will be safe, secure, and ready to use when we’re done.
Why Choose Professional Installation
Professional installers have experience with many different fixture types and home construction methods. We know which techniques work best for homes in Florida. Our work is also insured and backed by warranties.
DIY projects often take much longer than expected. Professional installation is typically completed within a few hours, allowing you to enjoy your new lights right away.
Comparison Table: Common Light Installation Types
| Light Type | Average Time | Tools Needed | Difficulty Level |
|---|---|---|---|
| Ceiling Light | 1-2 hours | Drill, screwdrivers, wire nuts | Beginner |
| Chandelier | 2-4 hours | Heavy-duty ladder, helper | Advanced |
| Recessed Lights | 3-6 hours | Hole saw, fish tape | Intermediate |
| Wall Sconces | 2-3 hours | Stud finder, level | Intermediate |
Frequently Asked Questions
Q: How much do professional light mounting services cost in Orlando?
A: Light mounting services typically cost $75 to $200 per fixture, depending on complexity. Simple ceiling lights cost less than heavy chandeliers. We provide free estimates for all lighting projects.
Q: Do I need a permit for ceiling light installation in Orlando?
A: Most ceiling light replacements don’t need permits if you’re using existing electrical boxes. New wiring or heavy fixtures might require permits. We can help you determine what’s needed for your project.
Q: Can you install pendant lighting over my kitchen island?
A: Yes, we install pendant lighting throughout Orlando. We’ll help you choose the correct number, size, and spacing for your island. Proper height and spacing make a significant difference in both appearance and functionality.
Q: How long does a chandelier hanging service take?
A: Chandelier hanging service usually takes 2 to 4 hours, depending on the fixture size and ceiling access. Heavy or complex chandeliers might take longer. We constantly check the ceiling support before installation.
Q: What’s included in the LED light fixture install service?
A: LED light fixture install service includes removing old fixtures, installing new LED units, and testing everything. We also dispose of old fixtures properly. Dimmer switches and smart controls are available at an additional cost if needed.
Q: Do you provide recessed lighting installation services for whole rooms?
A: Yes, we’re experienced recessed lighting installers for single rooms or whole homes. We help plan the layout, check for obstacles, and ensure everything is installed correctly. Most rooms need 4 to 8 recessed lights for good coverage.
Q: Can wall sconce installation work in bathrooms?
A: Wall sconce installation works great in bathrooms when done correctly. We use fixtures rated for bathroom moisture and comply with local electrical codes. Proper placement eliminates shadows and provides even lighting.
Q: How do I find a good lighting contractor near me in Orlando?
A: Look for licensed, insured contractors with good local reviews. TJ Handyman Services has years of experience with Orlando homes. We provide references and a warranty for all our electrical work.
Q: Is electrical light mounting safe for DIY projects?
A: Simple electrical light mounting can be safe for experienced DIYers who follow proper procedures. However, complex projects or homes with old wiring should use professional services. Safety is always worth the investment.
Q: What’s the difference between a flush mount light install and regular ceiling lights?
A: A flush-mount light installation creates fixtures that sit directly against your ceiling. Regular ceiling lights hang down from chains, stems, or other hardware. Flush mounts work better for low ceilings and modern styles.
Conclusion
Professional light mounting services transform your Orlando home with safe, beautiful lighting solutions. From simple ceiling light installation to complex chandelier hanging service, proper installation makes all the difference. Whether you need LED upgrades, pendant lighting, or recessed lights, working with experienced contractors ensures lasting results.
Don’t let lighting projects stress you out or put your family at risk. TJ Handyman Services brings years of experience and professional tools to every job. We handle everything from planning to cleanup so that you can enjoy your new lights right away.
Ready to brighten your Orlando home? Call TJ Handyman Services at 321-424-8590 or visit www.tjhandymanservicesllc.com for your free lighting consultation. Let us show you how professional installation brings your lighting dreams to life.